
How to Use the PhilHealth Check Utility (PCU) in 5 Steps
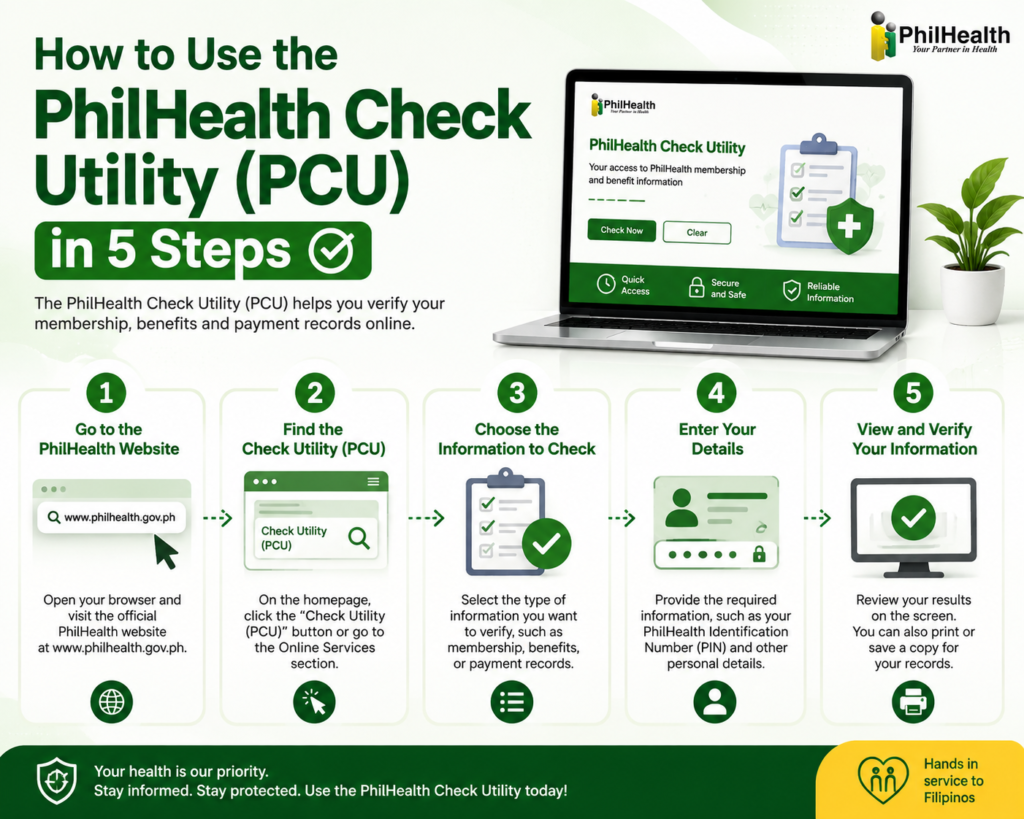
The PhilHealth Check Utility is a convenient online resource designed to help members quickly verify important PhilHealth membership details and access essential information about their accounts. Instead of spending unnecessary time searching through different pages, users can use the utility to check relevant PhilHealth benefits, membership information, and other services in one place.
Whether you are a newly registered member, an existing beneficiary, or simply want to confirm your current records, this tool can make the process easier and more convenient. Understanding how the PhilHealth online services work can also help you access healthcare-related information faster and stay informed about your available coverage and benefits.
Step 1: Access the Official PCU Portal
The PhilHealth check utility (PCU) gives members a secure, government-verified way to confirm their records, contributions, and eligibility status online. Before you can do any of that, you need to reach the correct portal — and that single step matters more than most people realise.
Launched to protect member data and eliminate false claims through digital verification, the PCU sits within PhilHealth’s broader YAKAP (Your Kalusugan is Our Commitment and Priority) initiative, which aims to modernise member services across the Philippines. It is a distinct tool from the standard Member Inquiry Facility, which handles contribution records only — the PCU goes further, incorporating biometric verification.
Follow these steps to reach the portal safely:
- Open a trusted browser and type pcu.philhealth.gov.ph directly into the address bar — never follow links from unsolicited emails or social media posts, as phishing sites mimicking official pages are common.
- Confirm the padlock icon and the philhealth.gov.ph domain appear in your browser’s address bar before proceeding.
- Check your internet connection is stable; the PCU’s biometric verification phase streams live data and will time out on an unreliable signal.
- Bookmark the verified URL immediately so future visits bypass the risk of mistyped addresses entirely.
Once the portal loads correctly, you are ready to gather your documentation — and that preparation stage, covered next, requires careful attention to file formats and sizes.
Step 2: Prepare Your Digital Documents
With portal access secured, your next task is gathering the correct documents before you proceed further into the PhilHealth Member Portal verification flow. Uploading the wrong file type or an oversized scan is one of the most common reasons submissions fail at this stage.
PhilHealth requires new members to upload scanned copies of the PMRF and valid IDs in PDF or JPEG formats for system validation. The PhilHealth Member Registration Form is the foundational document the portal checks against your existing records. Government portals enforce strict file size limits — typically under 2MB per file, and often far lower for individual ID uploads — so precision matters.
Follow these steps to prepare compliant documents:
- Locate your completed PMRF and gather at least one valid government-issued ID.
- Scan each document at a resolution between 150–300 DPI and save as JPEG or PDF only.
- Check each file’s size against the portal’s stated limit before uploading.
- Compress any oversized images using CompressImageTo20KB.in, which lets you hit precise kilobyte targets without quality loss.
- Confirm that compression ran entirely in your browser — the tool processes files client-side, meaning your sensitive government IDs never leave your device.
- Save the compressed files to a clearly labelled folder so you can upload them quickly in the steps ahead.
Client-side compression is particularly important here. Because your documents contain sensitive personal data, tools that process files locally — rather than on a remote server — significantly reduce the risk of exposure. Once your documents are sized correctly and saved, you are ready to move into the identity verification stage, where the portal will prompt you to input your personal details and complete a liveness check.
Step 3: Complete the Identity Verification and Liveness Check
With your documents prepared, you are now ready to complete the most technically involved stage of the process. This step confirms your identity through a combination of personal data inputs and a real-time facial biometrics check — the same mechanism that makes accessing your PhilHealth Member Data Record (MDR) online secure and fraud-resistant.
PhilHealth requires your Date of Birth, Sex, and Facial Biometrics to authenticate your identity before granting access to member records. Complete the sequence below carefully to avoid verification failures.
- Enter your PhilHealth Identification Number (PIN) into the designated field, then input your registered Date of Birth and Sex exactly as they appear on your PhilHealth records.
- Grant camera permissions when the browser prompts you — the liveness check cannot proceed without microphone and camera access enabled.
- Position your face centrally within the on-screen frame, ensuring your full face is visible and unobscured.
- Follow the on-screen movement prompts (such as blinking or turning your head slightly) — the system requires real-time motion to confirm you are a live person, not a photograph, thereby preventing identity theft.
- Troubleshoot a failed liveness check by moving to a well-lit area, choosing a plain background, and closing any applications competing for camera access.
- Resubmit the check if the system times out — refreshing the page and repeating from step three tends to resolve most persistent errors.
Pro-tip: Natural daylight facing your screen works considerably better than overhead artificial lighting, which often creates shadows across your face that confuse the biometric sensor.
Once verification succeeds, the portal will load your membership profile — setting the stage for reviewing your Member Data Record in the next step.
Step 4: Verify Your Member Data Record (MDR)
Once your identity check is complete, you can retrieve and interpret your Member Data Record (MDR) — the official summary of your PhilHealth membership status and contribution history. This record is what hospitals and clinics request when you avail of benefits, so accuracy here is essential. The PCU PhilHealth Gov PH portal surfaces this data directly from the national registry, and verifying your 12-digit PIN alongside your contribution records is a prerequisite for hospital benefit availment.
- Review your membership details on the MDR screen — confirm your full name, date of birth, and PhilHealth Identification Number (PIN) are correct.
- Check your contribution history carefully, ensuring posted payments match your employment or self-payment records across all periods.
- Cross-reference PSA-integrated data, which the portal uses to validate civil registration details; discrepancies here may affect your benefit eligibility.
- Generate your MDR by selecting the print or download option within the portal — save it as a PDF for hospital admissions.
- Flag any discrepancies immediately by visiting your nearest PhilHealth branch or submitting a correction request through the Member Inquiry Facility.
- Request an updated MDR once corrections are confirmed, then retain a digital copy for future benefit claims.
Keeping your MDR accurate is not a one-time task — and the next section explains precisely how to maintain those digital records over time.
Also Read :- PhilHealth Online Registration: Why 90% of Filipinos Get This One Step Wrong
How to Maintain Your Digital PhilHealth Records
Completing your PhilHealth check is not a one-off task. With over 100 million registered Filipinos now on PhilHealth’s books, keeping your own records accurate and accessible is a genuine responsibility — part of the everyday financial hygiene that marks sensible adult life in the Philippines.
- Compress and store digital copies of your valid IDs in a clearly labelled folder. Keeping compressed files ready means future updates, corrections, or re-verifications take minutes rather than hours.
- Schedule a monthly contribution check via the [PhilHealth Member Inquiry portal](https://memberinquiry.philhealth.gov.ph/member/) to confirm that posted payments match your payslip deductions. Unposted contributions are far easier to dispute when caught early.
- Save a PDF copy of your Member Data Record (MDR) after each review. This provides a timestamped record you can present to employers, hospitals, and or government agencies without logging in again.
- Use only secure, browser-based tools when handling sensitive documents. Avoid uploading ID scans to unverified third-party applications; a reputable browser with an up-to-date security certificate is sufficient for all PCU tasks.
Treat these habits as a short routine rather than an occasional chore. Your MDR is a living document, and consistent attention ensures it reflects your actual membership status whenever you need it most.